
Sunday, May 31, 2009
What I did with the extra cupcakes....
I had a half dozen cupcakes leftover from the Cupcake Roundup i'm participating in. I have been wanting to make these for the longest time. Hoops & Yoyo cupcakes=) Short post, but I just wanted to remind you to vote for your favorite ice cream cupcake!
Thursday, May 28, 2009
My very first ice cream cupcake!
I couldn't sleep last night and instead of trying to do something that would help me fall asleep, I do something I know would keep me up. I went online. I brought my laptop to bed. Very bad, I know. Clearly, I wasn't thinking. Well, in the wee hours of the morning, I was browsing around and going through my blog list. I didn't get very far because once I got to I Heart Cuppycakes, I saw the link to Cupcake Project, which then led me to Scoopalicious. Well, it went downhill from there. I was not going to sleep anytime soon. I got super excited because they are holding their 2nd Annual Ice Cream Cupcake Roundup. I saw the deadline- May 31st! It's already the 28th! Before I forced myself to put the laptop away and go to bed, I knew the flavor of cupcake, ice cream, and the topping I wanted to do. First thing I did this morning was write up my grocery list. Your curious now aren't you? =)
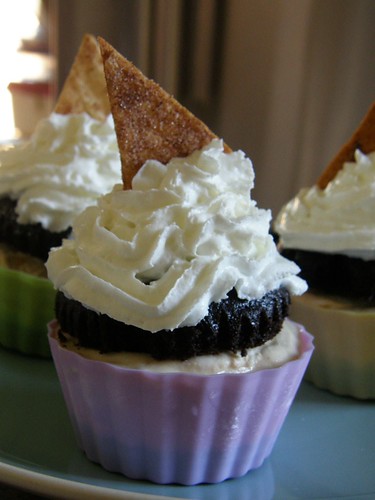
Introducing........
Mexican Chocolate Cupcake with Fried Ice Cream!
(topped off with Whipped Cream and a Cinnamon Sugar Baked Tortilla Triangle)
If your interested in entering the contest, visit Cupcake Project and Scoopalicious. Don't forget to check out the fabulous prizes! They have some awesome tips and instructions on how to make ice cream cupcakes. Make sure you do so before the 31st!
If your interested to know how I made these, lets get started!
This cupcake recipe is from 4 Obsessions- another blog I found online last night.
The leading ladies and gents of this production:
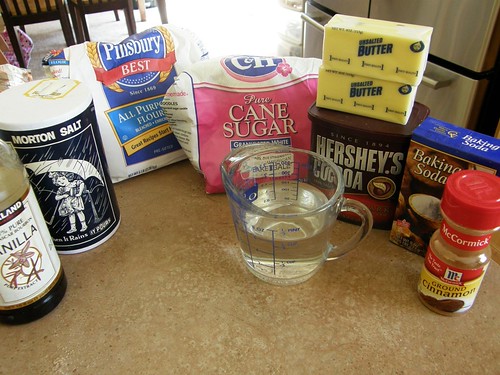
**I totally forgot to put the Buttermilk in the pic! So sorry!**
2 sticks (1 C) unsalted butter
1/2 C Dutch-process unsweetened cocoa powder
3/4 C water
2 C granulated sugar
2 large eggs
1/2 C well-shaken buttermilk
2 T vanilla
2 C all purpose flour
1 t baking soda
1 t cinnamon
1/4 t salt

Preheat oven to 350. Put cupcake papers in your muffin tins.
melt butter in a large heavy saucepan over moderately low heat, then whisk in cocoa. Add water and whisk until smooth. Remove from heat.
Whisk in separately sugar, eggs, buttermilk, and vanilla.
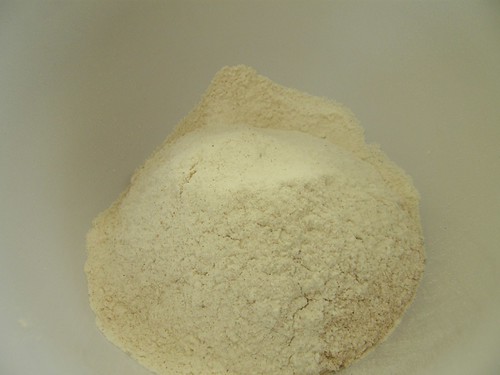
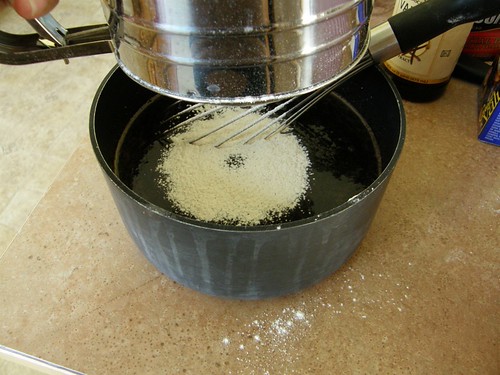
Sift together flour, baking soda, cinnamon and salt into a bowl. Then sift again into the cocoa mixture and whisk until just combined (it will be a little bit lumpy).
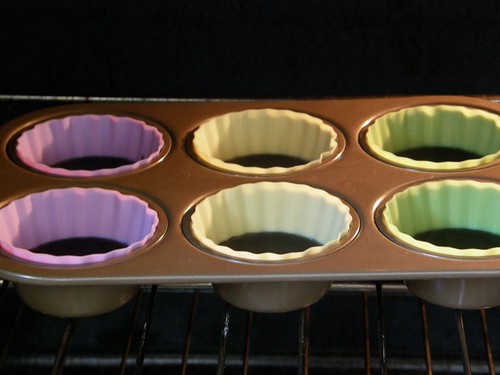
**since these were the ones I wanted to use for the ice cream cupcakes, I only put in a tablespoon of batter in each liner. There was a lot of batter left, so I followed the instructions with the ones below**
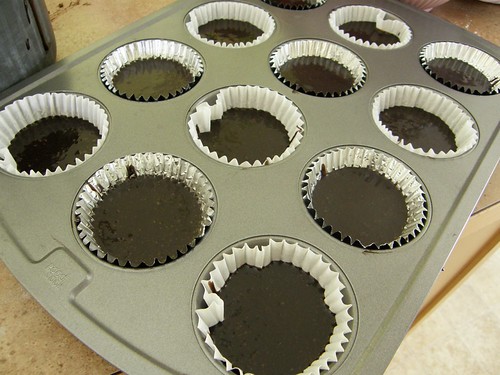
Fill cupcake papers to about 2/3 full. Bake for 20 minutes until a skewer or toothpick comes out clean. It's a moist cake, so don't worry if a few crumbs stick to your tester.
Allow cupcakes to cook and then dust with powdered sugar.
** For the ones with less cupcake batter, it baked for about 13 minutes in my oven- make sure you check yours after 10 minutes so you can pretty much estimate how much more time in needs baking**
Just in case your wondering how I didn't get chocolate batter all over the place, I used a tablespoon sized scooper- just like this.
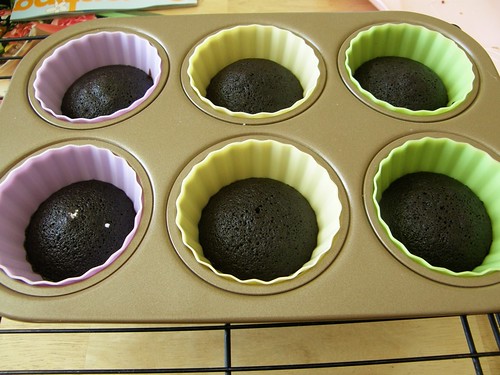
It came out with a really nice dome top. I let it cool for about 30 minutes them popped it in the freezer for about an hour or two. Now were ready for the ice cream.
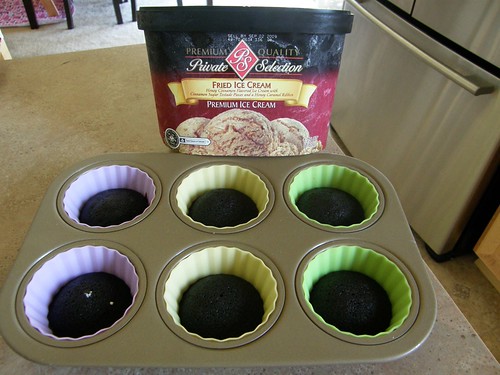
I got the ice cream at my local Fred Meyer grocery store (that's what its called in the Pacific Northwest). I believe its called Krogers in other places. The ice cream brand itself I think is their signature brand. So I don't think your able to find it elsewhere- but I could be wrong.
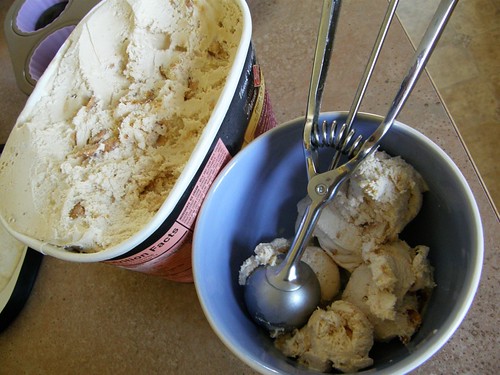
Look at that yummy goodness. This is how it's described on the box "Honey Cinnamon Flavored Ice Cream with Cinnamon Sugar Toasted Pieces and a Honey Caramel Ribbon". Oh, and right now that and the other flavors are 3 for $10. I put the ice cream in the bowl first to stir and soften it before placing it on top of the frozen cupcakes.

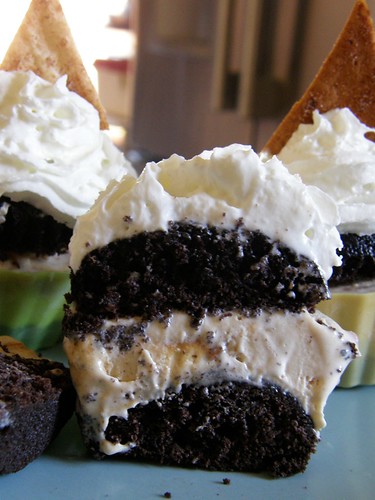
I froze it again for another hour before stealing 3 cupcake tops from my other set of cupcakes and placing it on top of the ice cream. Did you catch all that? Great=)
Well, maybe this picture will help:

Now all I have to do is take a can of whipped cream and go a tiny bit crazy. Okay, its not very crazy.
To make the Cinnamon Sugar Triangles, you will need:
Sugar
Cinnamon
Flour tortillas
Melted butter
Preheat oven to 400 degrees. Cut tortillas into triangles however big or small you want them. Place it on a cookie sheet ( I put foil on top of my cookie sheet) on a single layer. Place in oven for about 7 minutes or until brown. Depending on how much triangles you have will determine how much butter you put. You only need enough to coat the triangles. Place the triangles in a bowl and put some melted butter on top- a teaspoon at a time because you won't need much. Toss, and then sprinkle sugar and cinnamon, toss some more and your done!
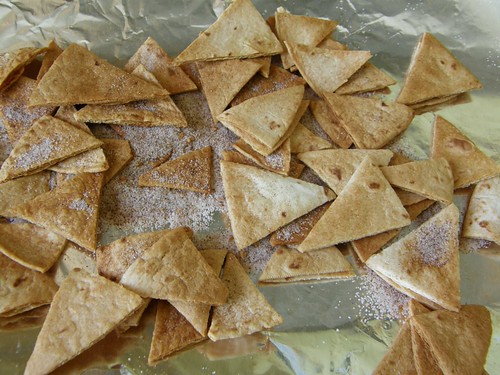
**I forgot to add the butter, such a dooofus** (I added it after I took the picture).
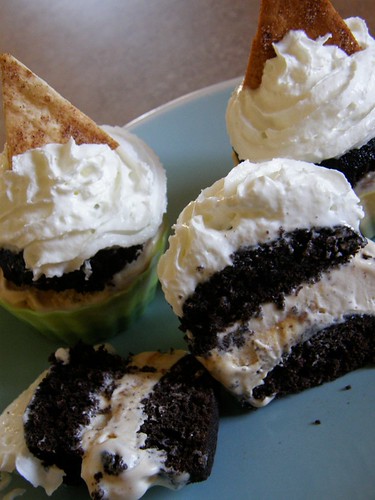
I have to say, this cupcake is so moist and yummy- and with the ice cream, and whipped cream. mmmgood! Please don't forget to vote for the cupcake of your choice the first week of June! Please visit Cupcake Project & Scoopalicious to cast your vote=)
Introducing........
Mexican Chocolate Cupcake with Fried Ice Cream!
(topped off with Whipped Cream and a Cinnamon Sugar Baked Tortilla Triangle)
If your interested in entering the contest, visit Cupcake Project and Scoopalicious. Don't forget to check out the fabulous prizes! They have some awesome tips and instructions on how to make ice cream cupcakes. Make sure you do so before the 31st!
If your interested to know how I made these, lets get started!
This cupcake recipe is from 4 Obsessions- another blog I found online last night.
The leading ladies and gents of this production:
**I totally forgot to put the Buttermilk in the pic! So sorry!**
2 sticks (1 C) unsalted butter
1/2 C Dutch-process unsweetened cocoa powder
3/4 C water
2 C granulated sugar
2 large eggs
1/2 C well-shaken buttermilk
2 T vanilla
2 C all purpose flour
1 t baking soda
1 t cinnamon
1/4 t salt
Preheat oven to 350. Put cupcake papers in your muffin tins.
melt butter in a large heavy saucepan over moderately low heat, then whisk in cocoa. Add water and whisk until smooth. Remove from heat.
Whisk in separately sugar, eggs, buttermilk, and vanilla.
Sift together flour, baking soda, cinnamon and salt into a bowl. Then sift again into the cocoa mixture and whisk until just combined (it will be a little bit lumpy).
**since these were the ones I wanted to use for the ice cream cupcakes, I only put in a tablespoon of batter in each liner. There was a lot of batter left, so I followed the instructions with the ones below**
Fill cupcake papers to about 2/3 full. Bake for 20 minutes until a skewer or toothpick comes out clean. It's a moist cake, so don't worry if a few crumbs stick to your tester.
Allow cupcakes to cook and then dust with powdered sugar.
** For the ones with less cupcake batter, it baked for about 13 minutes in my oven- make sure you check yours after 10 minutes so you can pretty much estimate how much more time in needs baking**
Just in case your wondering how I didn't get chocolate batter all over the place, I used a tablespoon sized scooper- just like this.
It came out with a really nice dome top. I let it cool for about 30 minutes them popped it in the freezer for about an hour or two. Now were ready for the ice cream.
I got the ice cream at my local Fred Meyer grocery store (that's what its called in the Pacific Northwest). I believe its called Krogers in other places. The ice cream brand itself I think is their signature brand. So I don't think your able to find it elsewhere- but I could be wrong.
Look at that yummy goodness. This is how it's described on the box "Honey Cinnamon Flavored Ice Cream with Cinnamon Sugar Toasted Pieces and a Honey Caramel Ribbon". Oh, and right now that and the other flavors are 3 for $10. I put the ice cream in the bowl first to stir and soften it before placing it on top of the frozen cupcakes.
I froze it again for another hour before stealing 3 cupcake tops from my other set of cupcakes and placing it on top of the ice cream. Did you catch all that? Great=)
Well, maybe this picture will help:
Now all I have to do is take a can of whipped cream and go a tiny bit crazy. Okay, its not very crazy.
To make the Cinnamon Sugar Triangles, you will need:
Sugar
Cinnamon
Flour tortillas
Melted butter
Preheat oven to 400 degrees. Cut tortillas into triangles however big or small you want them. Place it on a cookie sheet ( I put foil on top of my cookie sheet) on a single layer. Place in oven for about 7 minutes or until brown. Depending on how much triangles you have will determine how much butter you put. You only need enough to coat the triangles. Place the triangles in a bowl and put some melted butter on top- a teaspoon at a time because you won't need much. Toss, and then sprinkle sugar and cinnamon, toss some more and your done!
**I forgot to add the butter, such a dooofus** (I added it after I took the picture).
I have to say, this cupcake is so moist and yummy- and with the ice cream, and whipped cream. mmmgood! Please don't forget to vote for the cupcake of your choice the first week of June! Please visit Cupcake Project & Scoopalicious to cast your vote=)
Wednesday, May 27, 2009
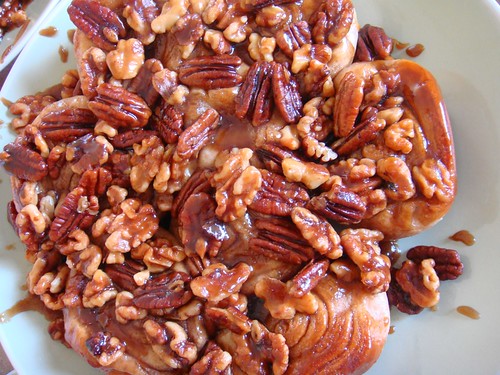
Whole Wheat Caramel Walnut & Pecan Rolls
This is the first time i've ever made this. I found a recipe online and tweaked it a little. There is a local bakery that makes this- except they only use walnuts on top. I am addicted to it. They always run out and sometimes I get lucky and get the last one=) Okay, lets get started.
The stars of the whole production:
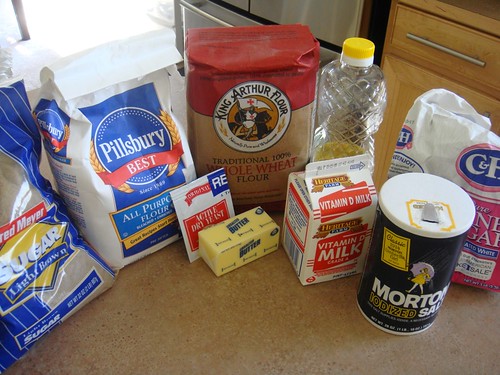
1 to 2 cups all purpose flour (follow directions)
1 cup whole wheat flour
3 tablespoons sugar
1 teaspoon salt
1 package active dry yeast
¾ cup milk
¼ cup water
2 tablespoons shortening or vegetable oil
1 cup firmly packed brown sugar
1/3 cup butter, melted
½ cup chopped, toasted nuts
**the next time I make this, I am going to use 2 cups of whole wheat flour and 1 cup of all purpose flour. The bakery's version uses mostly whole wheat flour. **
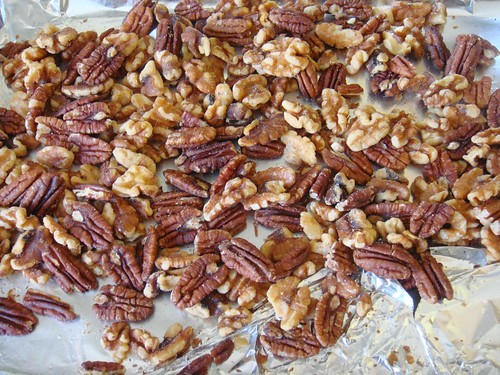
I toasted the nuts at 350 degrees for about 10-15 minutes, stirring and flipping it over every couple of minutes.

In large bowl, combine 1/2 cup of the all purpose flour, whole wheat flour, sugar, salt and yeast; blend well.

In small saucepan, heat milk, water and shortening (or oil) until very warm - 120-130 degrees; Add warm liquid mixture to flour mixture. Stir by hand until dry ingredients are moistened. Stir in an additional 1/4 cup to 3/4 cup flour to form a stiff dough.
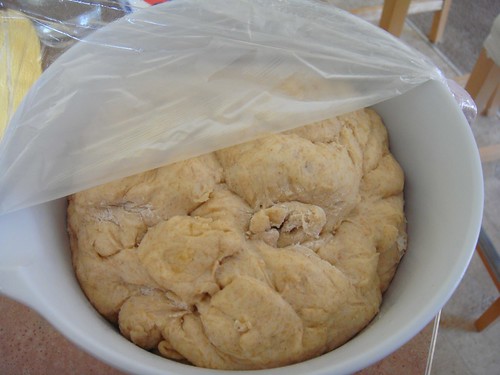
On floured surface (or in bowl of a stand mixer with dough hook), knead in remaining 1/4 cup to 3/4 cup all purpose flour. Knead about 5 minutes or until dough is smooth and elastic. Place dough in a greased bowl and cover. Set in a warm place to rise for 1 ¼ hour. **I have to admit that I added too much flour, then added some water- which made the dough too wet, then added flour again. So, my dough in that picture looks kinda funny. I used the dough hook on my Kitchen Aid and I over kneaded it. Don't make that same mistake because it will make the dough more chewy. I was talking to my brother on the phone while making this so I was distracted. It still turned out pretty good though.**
Grease a 9 inch square pan. Punch down dough and remove all air bubbles. On lightly floured surface, roll or press into 16×12 inch rectangle. (If you have trouble with this step, rub a thin layer of oil across the top of the dough).
In small bowl, combine brown sugar and butter. Spread evenly over dough then sprinkle with nuts. Roll into a 16 inch spiral/log pressing edges to seal. Cut into 16 slices and place cut side up in greased pan. Cover and let rise for 45 to 60 minutes.
Bake in a preheated 350 degree oven for 30-35 minutes. Cool two minutes, then turn onto a sheet of foil so that bottom side is up.
My Variation
I melted together a 1/2 cup of unsalted butter, 1 cup of packed brown sugar, & 2 Tbsp of light corn syrup in the microwave at 30 second increments, then stirred it together until it looked like this.
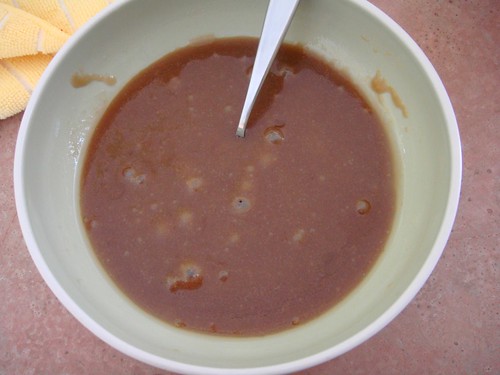
This is the caramel topping.
I got my pans ready- I used two 8" rounds, greased it and divided the caramel mixture in both pans, and placed the nuts on top. When I rolled out the dough, I rubbed a mixture of sugar and cinnamon on top before rolling the dough and cutting it.
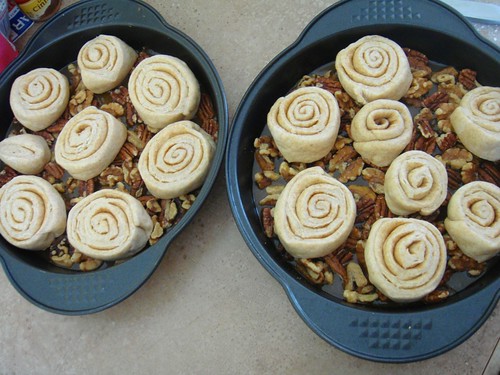
Again, the finished product:
Make sure you let it cool so the caramel gets nice and crunchy, but still chewy. Enjoy~ Happy eating=)
Saturday, May 16, 2009
Twilight cake
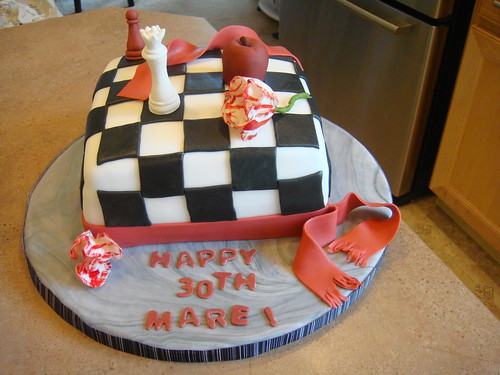
I am not a fan of Twilight, but my good friend is. I surprised her with this cake which has all the elements from the cover of each book. The chess pieces, the apple, the ribbon, and the flower. All the decorations where made from a gumpaste/fondant mix. I have to give credit to my husband who did the chess pieces. He did a great job don't you think? Well, this cake took about 3 days to make- the decorations needs drying time. The cake is a butter and french vanilla flavored with 3 layers of bavarian creme. I would have liked to get a picture of her slicing into it, but she didn't want to cut into it just yet. I think she admired it for a day or two before finally digging in=) Oh, I also made the cake board. I did a "marble" technique with red, black, and white fondant. It looked like a marble cutting board. It's very easy to make. As a matter of fact, here is the tutorial I used to make the cake board.
Friday, May 8, 2009
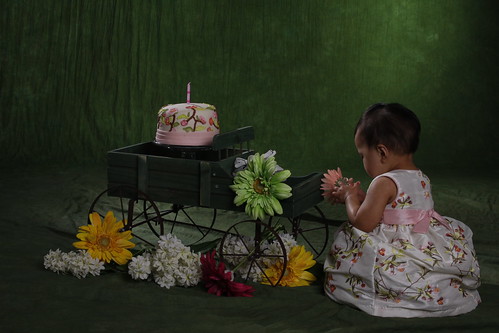
Matching birthday cake & dress
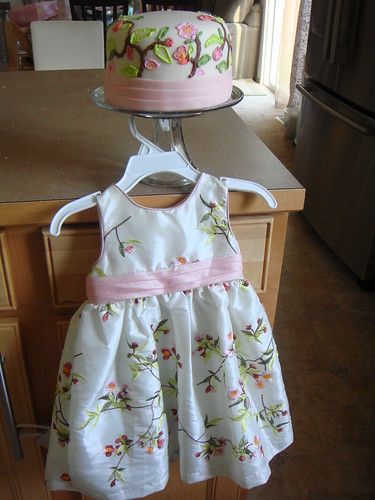
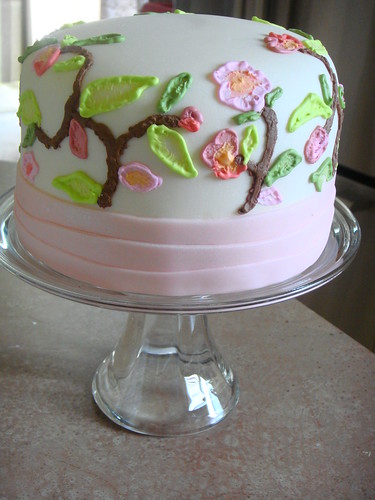
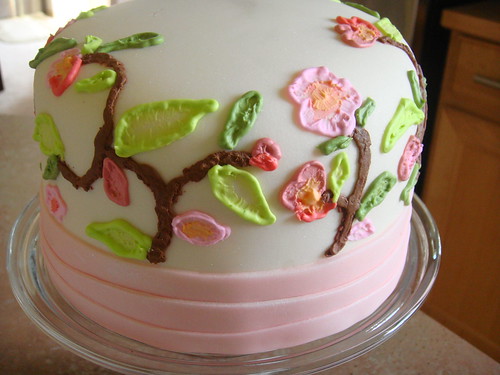
I saw this cute dress at Target when my daughter was 9 months old. I bought it knowing that I was going to have her wear it for her 12 month old photos. I thought the design was so cute that it would be perfect to match a cake to her dress for the photo shoot. I did a "practice cake" a month before- and i'm glad I did it. I learned A LOT from it- like not to use buttercream for the brush embroidery effect, not to fold the fondant for the sash (I ended up just overlaying 3 different sizes of the sash on the final cake), and that it was easier to level and tort the cake when it had been cooled in the refrigerator first.
This is the "Practice" cake and the filling- guava cake with guava gel filling (this was also the first time I tried this recipe-it basically was white cake mix with guava nectar substituted for the water. It wasn't all that great.)
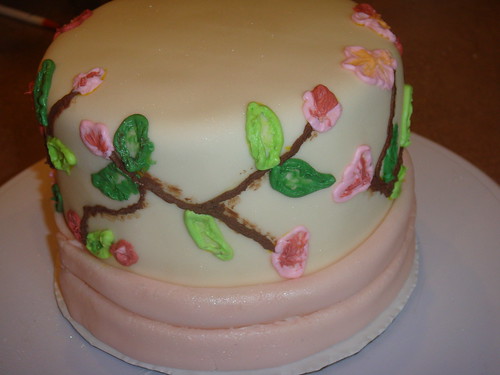

And the actual cake we used for my daughter's 1 year old photos:
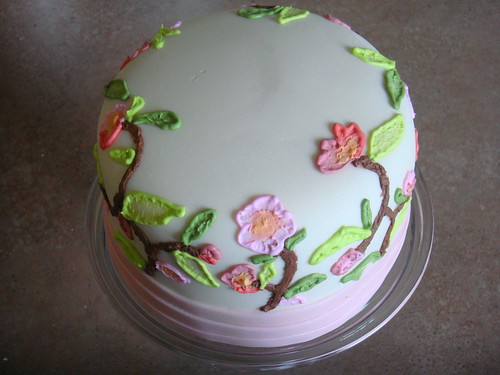
Oh, and here is one of the photos of my daughter with her cake:
Subscribe to:
Posts (Atom)


