- Featured prize from the very talented Etsy Artist Metal Sugar
- Cool Head Chefs utensils by Fiesta Products
- The awesome cupcake book Hello! Cupcake by Karen Tack and Allen Richardson
- A wonderfully crafted apron from Jessie Steele Aprons
- What every serious cupcake baker needs, a Cupcake Courier&
- a publication of Taste of Home magazine, which has delicious recipe ideas.
Sunday, September 28, 2008
Voting starts today for Iron Cupcake: Basil!
Thursday, September 25, 2008
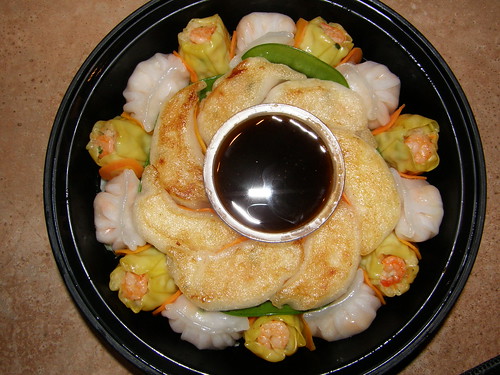
DimSum from Costco?
Yep, and for $9.99, you can get one at your local Costco. It looks really pretty and yummy...but is it?
Well, I liked 2 out of the 3 types. The one I didn't like was the one with the shrimp, which you can see, has the yellow wrapper. The dip tastes like a plum sauce, which is okay. Will I get it again? Probably not. My husband agrees.
My semi-healthy spaghetti
It tasted really good and it was fast and easy.
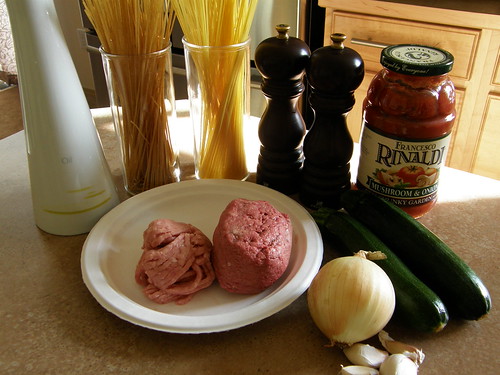
Ingredients & directions:
- 1/2 whole wheat thin spaghetti & 1/2 angel hair pasta (its 1/2 of how much you want, depending on how many your feeding).
- 1 jar of spaghetti sauce
- 3 cloves of garlic
- 1 medium onion
- 2 medium sized zucchini
- 1/4 lb ground turkey
- 1/2 lb lean ground beef
- 2 tbsp olive oil
- salt and pepper
- Boil a stock pot halfway full of water. When boiling, add some salt and olive oil to season the water.
- Put in the whole wheat pasta only and cook for about 3 minutes. Mixing every now and then so it doesn't stick.
- Add the regular pasta and cook together for another 5-6 minutes, just until they are both al dente.
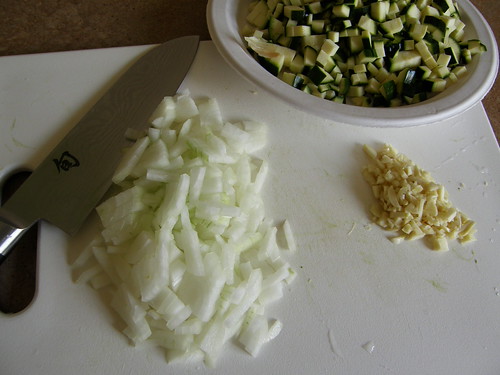
- Dice up the onions and zucchini. Roughly chop the garlic.
- Heat up a large saute pan and add the ground beef. Cook until browned, remove and add the ground turkey to the pan and cook until browned. Add the ground beef with the ground turkey and also add the diced onions and garlic. This is when you want to add a tbsp of olive oil. (If your using a fattier ground beef, I suggest you drain that fat and use the olive oil instead).
- Cook until the onions are almost transluscent and then add the zucchini. Let it cook for about 2-3 minutes stirring occasionally. You can then add the whole jar of tomato sauce. Turn the heat down to med/low, stirring occasionally. Add the salt and pepper to your taste.
Once the pasta is done, immediately turn the heat off and drain the water. Do not run cold water over the pasta! Plate your pasta, add your sauce and your done.
*other stuff*
~if your like me and want to get every bit of sauce out of the jar, I get some of that pasta water and swirl it before adding it to my sauce. I like it because it thins out the sauce just a little bit.
~This was my first time using the Rinaldi spaghetti sauce. I think i'm going to get it from now on. I really, really liked it. I didn't have to add too much to it.
~While cooking the meat together, I added dried oregano to make it taste more "italian".
~I like onion and garlic flavor so I added OnionOnion and GarlicGarlic seasoning from Tastefully Simple. It's a little expensive but its the best stuff...and they don't sell it in stores. No I don't sell it.
~I also like spicy stuff, so after I plated my pasta and tasted it, I added some Sriracha sauce. It was yum!
I think you can guess what this is.
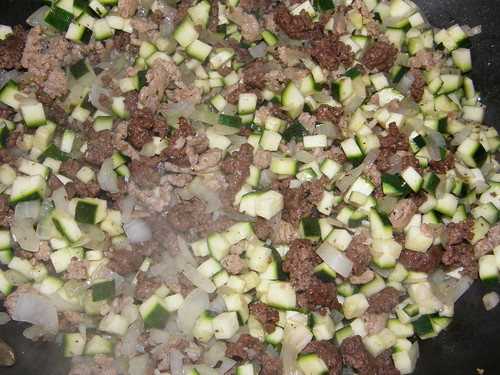
Just added the zucchini to the mix. I usually add my salt and pepper at this stage, then see if I need more after I add the tomato sauce.
And here it is again, the finished product. I couldn't taste the whole wheat pasta, which is good, because the texture is kinda weird. I think next time I will substitute the ground beef with chopped up portabello mushrooms. We'll see how that goes.
Wednesday, September 24, 2008
Custard pie #1
This is the first time i've ever made custard pie. It won't be my last either, that's why i've numbered it. I got the recipe from Allrecipes.com. It had good ratings so I had to try it. The next recipe i'm going to try is from Martha Stewart's website.
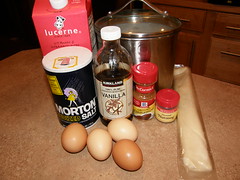
The ingredients and instructions. (BTW, I forgot to take out the cinnamon from this shot. I was going to make Sweet Potato Pie~ which I am going to make later).
1 (9 inch) unbaked pie crust
3 eggs, beaten
3/4 cup white sugar
1/4 teaspoon salt
1 teaspoon vanilla extract
1 egg white
2 1/2 cups scalded milk
1/4 teaspoon ground nutmeg
3 drops yellow food coloring (optional)
DIRECTIONS
1. Preheat oven to 400 degrees F (205 degrees C).
2. Mix together eggs, sugar, salt, and vanilla. Stir well. Blend in the scalded milk. For more yellow color, add few drops yellow food coloring.
3. Line pie pan with pastry, and brush inside bottom and sides of shell with egg white to help prevent a soggy crust. Pour custard mixture into piecrust. Sprinkle with nutmeg.
4. Bake for 30 to 35 minutes, or until a knife inserted near center comes out clean. Cool on rack.
I cannot stress enough that when you are adding the scalding milk, you need to temper it first. Meaning, add a little amount of the scalding milk very slowly to the egg mixture while your mixing it. I added a ladle at a time. Trust me, if you don't do this, your eggs will cook and your pie will taste like scrambled eggs. Do not rush this step.
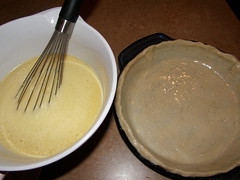
Here is the custard mixture and pie crust brushed with the egg white. Before you add the custard mixture, make sure you prick the pie dough with a fork. Don't forget to get the sides too.
All set and ready for the oven.
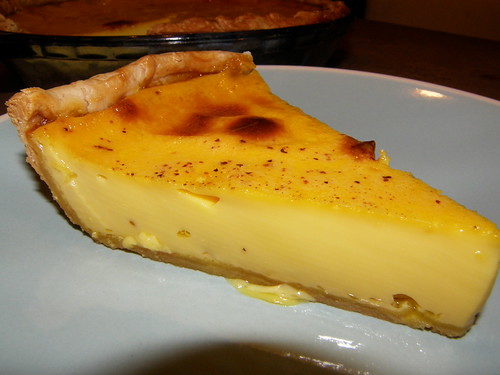
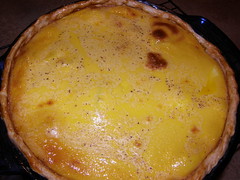
Out of the oven for cooling. I think I added another 15 minutes in oven time because it wasn't quite done. It looks very yellow because I added yellow food coloring. I used the Wiltons Buttercup Gel food coloring. I don't think i'll use it next time if I make this recipe again, just because i'd like to see what it would look like without the coloring.
So let your pie cool overnight. I personally like mine cold, right out of the refrigerator. My husband liked this pie. He didn't think he would because he thought it needed more eggs. The Martha Stewart recipe requires 12 eggs so we'll see if thats a winner. I won't be making it anytime soon, but I will make it. Enjoy & Happy Eating!
Chicken kelaguen
This is one of the favorite fiesta dishes of Guam. It is definitely one of my favorites. I guess you can say its made like a ceviche, except the chicken isn't raw, its fully cooked. My mother in law makes THE BEST chicken kelaguen. She makes it the way its supposed to be made. I make it the short cut way. You are actually supposed to barbecue the chicken. I think its just seasoned with salt. I use the Costco rotisserie style chicken which makes it so fast and easy to make.
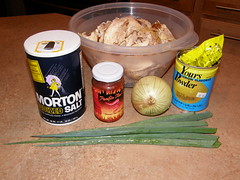
Here are my ingredients:
Salt
Hot pepper paste from Guam (you can use fresh hot peppers if you can find it at the Asian store)
1 medium onion
Green onions
Lemon powder (in Guam we use Calamansi, but you can use lemons. I think some Asian stores carry the lemon powder.)
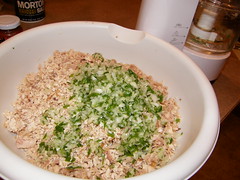
So after you remove the meat from the bone, you will need to dice it into small pieces. I used a food processor and pulsed it until it was the size I wanted it. I then cut the onion into quarters and placed it in the food processor along with the green onions.
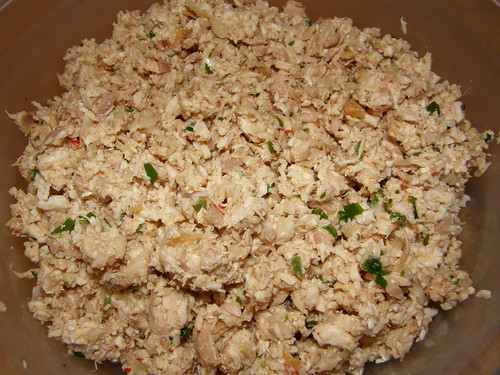
The chopped up chicken and onions. Ready for some salt, lemon powder and hot pepper.
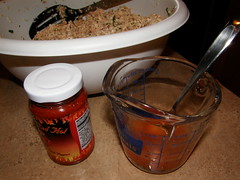
I added about a tablespoon of lemon powder to 1/2 cup of water and about 1 teaspoon of the hot pepper paste. I sprinkled about a teaspoon of salt onto the chicken and onion mixture before adding the liquid. I don't really measure, I just go by taste. You can adjust whatever you need to depending on how you like it. I like my kelaguen very lemony so I add a little more lemon powder.
Make sure you mix everything together and taste it before you add more spice or seasonings.
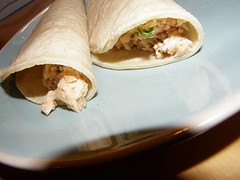
Easy right? It's nothing compared to the real thing though. In Guam we usually add fresh grated coconut to it. On this night, I ate it with corn tortillas, just like they used to sell it at Yigo Mart. It also tastes good with flour tortillas~ just like they used to sell at the student store at my high school (actually, i'm pretty sure they sold it at all the high schools). It looks and tastes better alongside red rice, pancit, lumpia, and titiyas. That's another blog...
Just to let you know, if you use the corn tortillas, wet a paper towel, wrap the tortillas in it and microwave for 30 seconds. It gets soft and it won't tear when you place the kelaguen inside. It also tastes better.
As for storing leftovers, it has to be refrigerated and its eaten cold so don't heat it up after its made. Happy Eating!
Tuesday, September 23, 2008
Dinner & a movie.
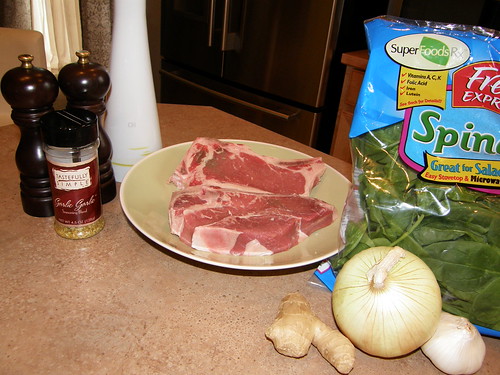
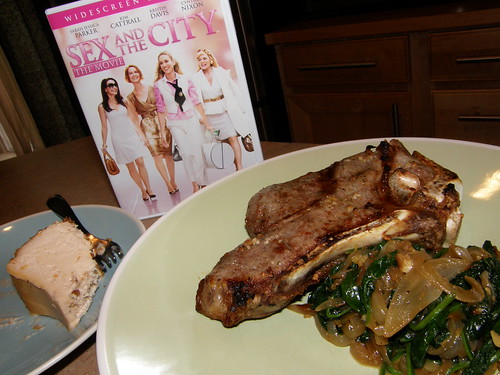
For the release of the Sex and the City dvd, I decided to make New York Steak with Spinach and carmelized onions and New York Cheesecake for dessert. It was easy to make, but I made some bad decisions, which resulted in an "okay" dinner.
2 inch thick New York steaks
1 bag of spinach
1 onion
garlic
ginger
olive oil
salt & pepper
and whatever seasonings you like for your steak. I like garlic, so I added some Tastefully Simple Garlic to my steaks.
Chop up some fresh garlic and add it to 1/4 cup of olive oil. Rinse the steak and pat it dry. Add salt and pepper to the steaks then brush it with the olive oil mixture on both sides. Turn on the oven to broil (I suggest you grill the steaks instead, if you grill it). While letting the steaks sit for a few minutes, you can slice your onions and dice the ginger and garlic for the spinach. You want make sure you dice the ginger into tiny pieces. I used about a tablespoon of fresh ginger. Add as much garlic as you want for the spinach. Place the steaks in the oven and cook 4-5 mins on each side. When its done, remove from the oven and let the steaks sit for 15 minutes. The reason why you want to do this is because if you cut into it right away, all the flavor and juices escape. While waiting, you can cook the spinach so its nice and hot when you cut into your steak.
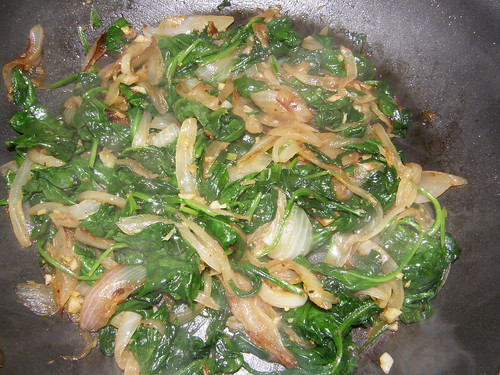
Heat up a large saute pan and add some olive oil. Add the onions and cook until it is brown and carmelized. Add the garlic and ginger, stirring often for about 1-2 minutes. Add the spinach little by little, as it wilts. Trust me, you will use the whole bag. When all the spinach has reduced in size, immediately turn the heat off and add a little bit of salt and pepper. I used just a dash of salt, added about a teaspoon of soysauce and a teaspoon of sesame oil. Mix and adjust the flavors to your taste.
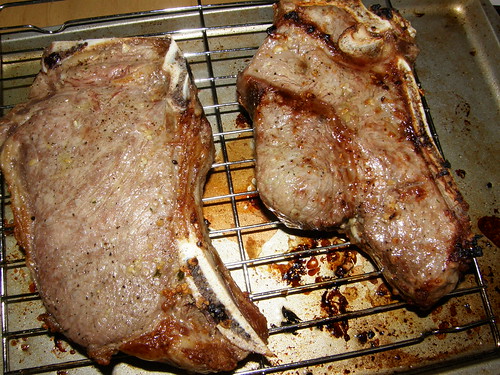
It was raining, cold, and ugly outside so I didn't want to fire up the grill**bad decision**. So I thought it would be a good idea to "broil" the steaks. The steaks were about an inch thick and we like it medium, so I put it in for 4-5 minutes before I turned it over for another 4-5 minutes. This is what it looked like. I'd much prefer the grill, so i'll never make this mistake again.
Tuesday, September 16, 2008
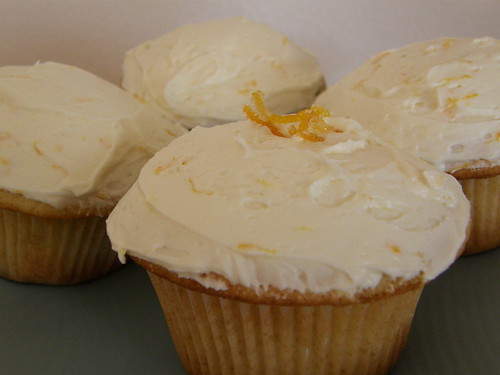
Lemon cupcake with Lemon/Lime/Basil curd & Orange Zest Buttercream Frosting
After voting and looking at all the goodies in last months contest, i've decided to join IronCupcake: Earth. It's basically the Iron Chef of the cupcake world. Secret ingredients and original recipes. This month's secret ingredient is Basil.
I never really liked lemon flavored desserts, but i've always heard lemon & basil go well together, so I thought i'd give this challenge a try.
I saw a Raspberry cupcake with Meyer Lemon curd on Martha Stewart's show. I liked the idea of the curd, so I decided to use the same idea, but use different flavors to include basil.
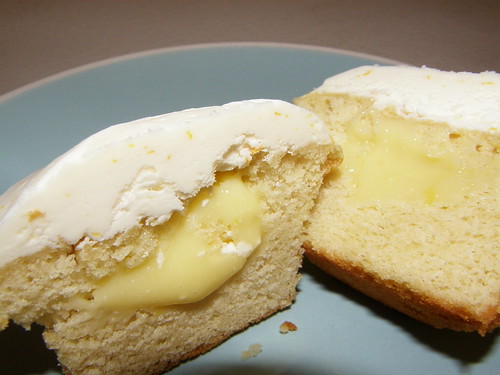
I came up with this Lemon Cupcake with Lemon/Lime/Basil curd filling & Orange Zest Buttercream Frosting.
Look at that yummy goodness inside.
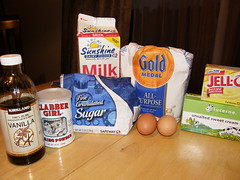
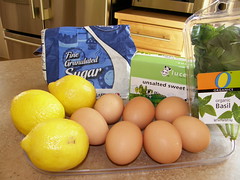
Ingredients and recipe for the Lemon cupcake:
1 cup sugar
1/2 cup butter
2 eggs
2 tsp. vanilla
1 1/2 cups all-purpose flour
1 3/4 tsp. baking powder
1/2 cup milk
1/2 package Lemon pudding mix
- Preheat the oven to 350°F.
- Place cupcake liners into the cupcake tin.
- In a medium bowl, cream together the sugar and butter.
- With an electric mixer, beat in the eggs, one at a time. Add the vanilla.
- Combine the flour and baking powder in a separate bowl. Stir ittogether.
- Add this dry mixture to the creamed mixture. Mix well.
- Stir in the milk until the batter is smooth. Pour or spoon batter into the prepared pan.
- Bake 20 to 25 minutes.
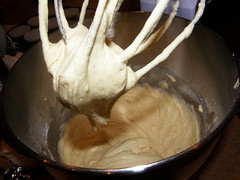
Batter all mixed up and ready for the cupcake liners.
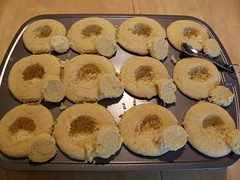
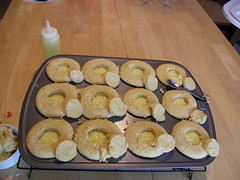
Cupcakes cooled and hollowed for the curd.
Ingredients for the Lemon/Lime/Basil curd:
3 eggs
4 egg yolks
Zest of 3 lemons
1 cup of lemon/lime juice (it was actually supposed to be a whole cup of lemon juice but I only had the 3 lemons and it wasn't even close to filling a cup, so I used 4 limes I had lying around to make a full cup) .
1 stick of butter (1/2 cup) ~ chilled and cut up into small pieces
1 cup sugar
Directions
- Prepare and ice-water bath. Set a medium bowl in ice-water bath and set aside.
- Place sugar and lemon zest and basil leaves in a mortar and grind witha pestle to combine and release the oils.
- Transfer sugar mixture to a medium heatproof bowl along with eggs and egg yolks; whisk to combine.
- Place over a saucepan of simmering water and whisk until sugar has dissolved.
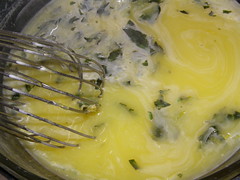
- Add lemon/lime juice and basil leaves and continue whisking until mixture is thick and reaches 160 degrees on an instant-read thermometer, scraping down sides of bowl as necessary.
- Add butter and whisk until well combined.
- Strain lemon/lime/basil mixture through a fine mesh sieve set over prepared bowl. (I used a strainer and cheesecloth).
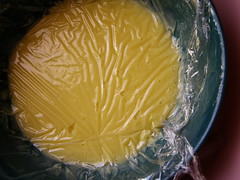
- Cover curd mixture with plastic wrap, pressing plastic wrap directly onto surface.
- Transfer to refrigerator until completely chilled.
I just used a basic buttercream frosting and added a tablespoon of orange zest.
Here is the recipe I used:
2 sticks of butter (1 cup)
Pinch of salt
2-1/2 c. of confectioners or powdered sugar
1 tsp vanilla
1 Tbsp orange zest
In an electric mixer, mix the butter and confectioners sugar until fluffy. Add a pinch of salt. Scrape down the sides of the mixer. Add the vanilla and orange zest. Add milk one teaspoon at a time. Mix until well combined.
- Featured prize from the very talented Etsy Artist Metal Sugar
- Cool Head Chefs utensils by Fiesta Products
- The awesome cupcake book Hello! Cupcake by Karen Tack and Allen Richardson
- A wonderfully crafted apron from Jessie Steele Aprons
- What every serious cupcake baker needs, a Cupcake Courier&
- a publication of Taste of Home magazine, which has delicious recipe ideas.
Lemon poppyseed cupcake with Orange Basil syrup & Orange Basil Cream cheese Frosting
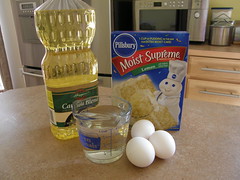
This is my Lemon Poppyseed cupcake with Orange Basil syrup and Orange Basil Cream cheese Frosting.
1 Lemon cake mix
3 eggs
1 cup water
1/3 cup vegetable oil (I used Canola Oil)
1 Tbsp Poppy seeds (I forgot to add it to my shot)
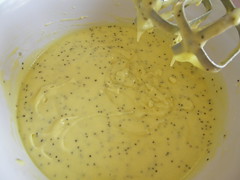
Follow package directions on back of the box. I added the poppyseeds after the batter was almost completely combined.
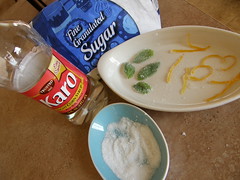
All you need is:
Light Karo Syrup
Sugar
Lightly coat the basil leaves and orange zest with the karo syrup then coat with the sugar. Easy right?
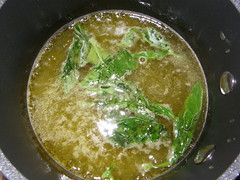
Ingredients:
1/2 cup Freshly squeezed orange juice
1/2 cup sugar
8 basil leaves
Boil orange juice over medium heat, add the sugar and keep stirring until sugar is dissolved. Tear the basil leaves in half and bruise them slightly by twisting them to release the oils and fragrance of the basil. Add it to the syrup. Turn off the heat and let it sit in the syrup for about 10 minutes.
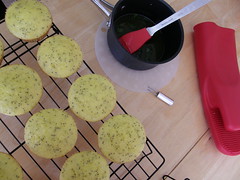
As soon as the cupcakes are done, prick the cupcakes while its still in the baking pan (I improvised and used a corn on the cob holder, which worked nicely) and brush the tops with the Orange Basil syrup. After it has cooled for 15 minutes, take it out of the pan and onto your cooling rack, then prick it again and brush the tops a 2nd time. While waiting for the cupcakes to cool, lets make the frosting.
I didn't get to take a picture of the frosting in the mixer, but its just like making any other frosting...nothing new. But here are the ingredients & directions:
8 oz. softened cream cheese
1/2 cup butter (1 stick)
3 cups confectioners sugar
1/2 tsp vanilla
1/8 tsp salt
1/4 cup of Orange Basil syrup
1 tsp milk
Directions
- In the bowl of an electric mixer,beat butter until creamy. Add cream cheese
- Slowly add confectioners' sugar; beat to combine, scraping down sides of bowl as necessary.
- Add Orange Basil Syrup and vanilla extract and beat to combine.
- Slowly add milk and continue beating on medium-low speed until smooth and creamy.
- Featured prize from the very talented Etsy Artist Metal Sugar
- Cool Head Chefs utensils by Fiesta Products
- The awesome cupcake book Hello! Cupcake by Karen Tack and Allen Richardson
- A wonderfully crafted apron from Jessie Steele Aprons
- What every serious cupcake baker needs, a Cupcake Courier &
- a publication of Taste of Home magazine, which has delicious recipe ideas.
Monday, September 15, 2008
Traditional Osso Buco & Italian Risotto
I first tried Osso Buco at an Italian Restaurant here in Olympia called Sorrento's. The risotto was really good, the Osso Buco was okay. I thought the veal shanks would be tender, it wasn't. I didn't know how it was supposed to taste, so I looked up several recipes and came across this one from Allrecipes.
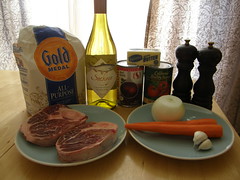
Ingredients:
2 pounds veal shanks, cut into short lengths
1/4 cup all-purpose flour
1/4 cup Butter
2 cloves garlic, crushed
1 large onion, chopped
1 large carrot, chopped
2/3 cup dry white wine
2/3 cup beef stock
1 (14.5 ounce) can diced tomatoes
salt and pepper to taste
Gremolata:
1/2 cup chopped fresh parsley
1 clove garlic, minced
2 teaspoons grated lemon zest
DIRECTIONS
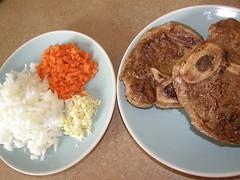
1.Dust the veal shanks lightly with flour. Melt the butter in a large skillet over medium to medium-high heat. Add the veal, and cook until browned on the outside. Remove to a bowl, and keep warm. Add two cloves of crushed garlic and onion to the skillet; cook and stir until onion is tender. Return the veal to the pan and mix in the carrot and wine. Simmer for 10 minutes.
2.Pour in the tomatoes and beef stock, and season with salt and pepper. Cover, and simmer over low heat for 1 1/2 hours, basting the veal every 15 minutes or so. The meat should be tender, but not falling off the bone.
3.In a small bowl, mix together the parsley, 1 clove of garlic and lemon zest. Mix into the veal just before serving. (This is the gremolata sauce which I haven't tried yet because I didn't want to add it to the sauce. I will try it the next time I make it though).
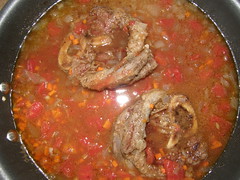
Braising the veal shanks.
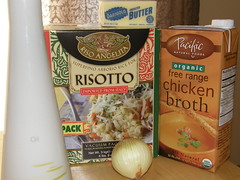
Ingredients for the Risotto.
I used the recipe on the back of the Risotto box. The first time I made this, I added fresh sliced button mushrooms. It was excellent. I intended to add mushrooms to my risotto again, but I didn't use it in time and it went bad.
Basic Ingredients:
2 Tbsp Olive oil
1 whole medium Onion
2 Tbsp Butter
5 cups Chicken Broth (preheated)
1 & 1/2 cup Risotto
Add the olive oil and butter in a large saute pan on medium heat. When melted, add onions and cook until golden brown, stirring often.
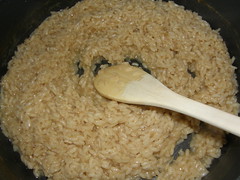
Add the risotto and stir for about 1-2 minutes.
Add the chicken broth one cup at a time, each time it is absorbed by the risotto.
Stir continuously for about 15-18 minutes. It is done when all the broth is absorbed and the risotto should be al dente.
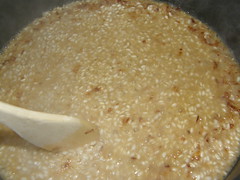
Risotto is al dente and done cooking. It looks undone, but it is still hot and cooking even when you turn the heat off. It will turn out perfect. Just remember to keep stirring and add enough of the chicken broth.
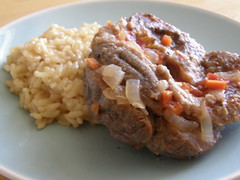
Here is the finished result. The veal shank tasted just like the one at the restaurant. Like the recipe says "it should be tender, but not falling off the bone". I like my meat falling off the bone. The reason why I made it again was because I liked when I made it the first time~ with a different type of meat. It was so tender. I thought it would be even better with the veal shank, since that's what the recipe called for. I was wrong.
So, I would make this again with the chuck roast meat or another stewing meat, but not with the veal shank. I ended up cooking it for another hour to make it a little more tender. It worked, but it was still a little rubbery to me. I also would add mushrooms to my risotto. I guess if I used a different cut of meat it wouldn't be called Osso Buco or would it still be?